How to Start Seeds Indoors: The Complete Guide
Starting seedsStarting seeds indoors is an excellent option for beginner and master gardeners alike. In this complete guide, we'll walk you through everything you need to know to get your seedling garden started.
We'll cover all the essentials of starting seeds indoors, from choosing the right containers and soil medium to providing the optimal lighting and temperature conditions for successful seed germination and healthy plant growth.
Whether you're interested in growing flowers, vegetables, or herbs, this guide will equip you with the knowledge and techniques to start your seeds indoors with confidence. And it's easier than you think.

Starting Seeds Indoors
Indoor seed starting can be done throughout the year and not just for spring planting. We start as many seeds indoors as possible so that we can control the germination process. By starting seeds indoors, we increase our seed germination rate and extend our growing season. And that means we can begin eating tomatoes even earlier!
Table of Contents
When to Start Seeds Indoors
Starting seeds indoors is a great way to get a head start on the growing season, especially in areas with shorter growing seasons or unpredictable weather.
The ideal time to start seeds indoors varies depending on the specific plant, but a general rule of thumb is to start seeds 6-8 weeks before the last expected frost date in your area.
This gives the seeds enough time to germinate and develop into healthy seedlings before being transplanted outdoors. However, it's important to consult the seed packet instructions for the specific plant variety you're growing, as some seeds may require a longer or shorter period of time to germinate and grow into healthy plants.
Last Frost Date
One crucial factor to consider when starting seeds indoors is the last frost date. Generally, frost occurs at or below 32ºF. The last frost date is the date for a specific region after which temperatures are above 32ºF.
To find your area's last frost date, you can refer to resources such as local agricultural extension offices or online tools. These resources take into account historical weather data to provide an estimate of the average last frost date.
Remember that this date is the best guess. There can always be unexpected frosts. But you can use this date to calculate the ideal timing for starting seeds indoors.

Maturity and Harvest Dates
Another thing to consider when deciding when to start seeds indoors is the harvest or maturity date. If you want flowers blooming for your flower farm or tomatoes ready to eat in June, you can plant your seeds indoors with those dates in mind. The number of days may vary depending on the specific variety of the plant.
The “days to maturity” is the approximate length of time from when the seed is planted to when the plant is ready to be harvested.
It's important to keep in mind that several factors can affect the maturity and harvest dates. These factors include the specific plant variety, growing conditions such as temperature and humidity, and environmental factors like light exposure and soil quality.
Supplies for Indoor Seed Starting
There are a few essential supplies you will need to start growing from seed.

Seedling Trays and Cells
When starting seeds indoors, there are several options to consider, such as trays with cells, seed-starting flats, peat pots, toilet paper rolls, newspaper pots, and even egg cartons.
Seedling trays with cells are a popular choice for many gardeners. These trays have individual cells that hold the seeds. They are convenient because they make transplanting easier and allow for easy organization of different seed varieties.
Another option is seed-starting flats, which are shallow, flat trays without individual cells. These flats are a good choice if you are planting a large number of seeds of the same variety. We use flats for starting onions and other seedlings that are easy to separate for transplanting.
Peat pots, toilet paper rolls, newspaper pots, and cardboard egg cartons are alternative biodegradable options and can be planted directly into the ground, reducing transplant shock for the seedlings. These containers also offer drainage, but it is crucial to ensure their durability to bear the weight of the soil and withstand the weeks until transplanting.
Be sure to only use clean containers for seed starting. This will help prevent fungal diseases which can kill tender seedlings.
Always make sure that the containers have drainage holes to ensure proper water flow and prevent waterlogging.
Soil for Seed Starting
When starting seeds indoors, selecting the right soil is crucial for the success of your seedlings. Unlike outdoor garden soil, the soil used for starting seeds should be sterile, lightweight, moisture-retaining, and well-draining.
A soilless mix is often recommended for starting seeds indoors. This type of mix is typically composed of materials like peat moss, perlite, and vermiculite. Peat moss helps retain moisture, while perlite and vermiculite improve drainage and prevent soil compaction.
Use our favorite recipe for creating a seed-starting mix.
Using garden soil for seed starting is not recommended. Garden soil may contain weed seeds and disease-causing organisms that can harm young seedlings.

Supplemental Lighting
Supplemental lighting is crucial for successful indoor seed starting. While natural light from a south-facing or sunny window can be sufficient for some seedlings, most will benefit from additional artificial lighting. This is especially true during the winter months when natural light is limited.
Fluorescent lights are a popular and cost-effective option for supplemental lighting. They provide a good spectrum of light and can be placed close to the seedlings without overheating them.
LED grow lights are another excellent choice. They are energy-efficient, emit less heat, and can be customized to provide the specific spectrum of light that seedlings need for optimal growth.
Position the lights about 2-4 inches above the seed trays or containers. Depending on your setup, you can raise the lights or lower the plants as the seedlings grow to maintain the same distance. We attach our lights to shelving units, so we lower the plants instead of moving the lights.
Seedlings typically need 14-16 hours of light per day. We like to use timers to turn lights on and off automatically. One less thing for us to remember during the busy planting season!

Heat Mat
A heat mat is a fantastic tool to improve seed germination when starting seeds indoors. It is a thin, reusable, waterproof mat that is placed under the seed tray to raise the soil temperature.
Heat mats can keep the soil at the optimal temperature for seed germination. Some seeds need warmer temperatures to germinate.
To utilize a heat mat, simply place it underneath the seed tray or container. Make sure that it is positioned on a flat, stable surface. You can then place your seed trays on top of the mat and proceed with seed sowing as usual. Always follow the specific heat requirements mentioned on your seed packet instructions for optimal germination.
If you don't have a heat mat, find warm places in your home, such as heating vents or on top of the fridge.
Mister or Spray Bottle
A mister or spray bottle is perfect for keeping the soil moist during the early stages of seed germination. Gently mist the soil surface to ensure it stays damp but not waterlogged. This method prevents the seeds from drying out or being disturbed by a heavy stream of water.
Another watering technique is bottom watering. Place your seedling containers in a solid tray and add water to the tray. The containers will absorb water from the bottom, ensuring the roots receive adequate moisture without wetting the foliage.
Bottom watering encourages deep root growth and helps prevent diseases caused by wet leaves.
Humidity Domes
Humidity domes are clear plastic covers that can be placed over seed trays or individual containers to create a mini greenhouse environment. You can also use plastic wrap in place of a dome.
Remove humidity domes once the seedlings have sprouted.
While the domes are essential for germination, they can also create a humid and stagnant environment if left on for too long. This can lead to damping off, which is a fungal disease that will kill off your seedlings.

Plant Labels
Proper labeling not only helps you stay organized but also ensures that you can easily identify seedlings as they grow. If you grow more than one plant or variety at a time, you will want to have it labeled.
There are all kinds of markers and labels you can purchase. We like simple, smooth wooden tags that we can stick in the trays. These can also be composted at the end of the season.
Seeds
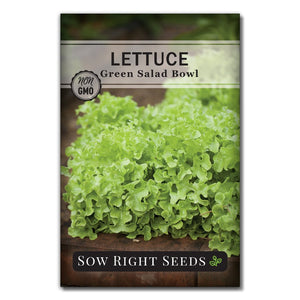
Seeds are the starting point for any successful garden, so choosing the best seeds is essential. Begin by selecting high-quality seeds from a reputable source. Consider using open-pollinated heirloom seeds that have been passed down through generations for their superior taste and unique characteristics.
Shop quality, heirloom vegetable seeds here.
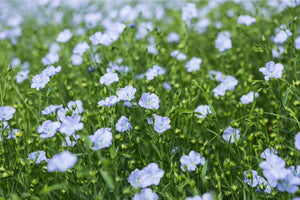
Sow Right Seeds flower seeds are open-pollinated, heirloom varieties.
These herb seeds have been handed down for generations and have culinary and medicinal uses.
Starting with good seeds is the first step towards a bountiful garden. Viable seeds with high germination rates will ensure you get off to a great start.
How to Start Seeds Indoors
Now that you have your seeds and supplies, it's time to plant indoors. Some seeds may need extra attention for optimal germination. Presoaking, scarification, and cold stratifying are three methods that weaken or break the seed coat to increase germination rates.
Soaking Seeds Before Planting
Not all seeds need to be soaked before planting. Check the seed packet to see if presoaking is necessary for the specific seeds you are planting. If soaking is recommended, overnight or for 12-24 hours is usually sufficient.
Some common seeds that benefit from soaking include morning glory, nasturtium, sweet peas, and sunflowers.
Seed Scarification
Some seeds have hard seed coats that can prevent water and oxygen from reaching the embryo inside, hindering germination. Scarification helps to overcome this barrier by creating small openings or weak points in the seed coat.
To scarify seeds, gently scrape the seed coat with a file or sandpaper. Be careful not to damage the embryo inside. For seeds with very hard coats, nicking the seed coat with a sharp knife or scissors can be effective.
Check your seed packet to see if scarification is recommended.
Seed Stratification
The purpose of stratification is to simulate the natural conditions that seeds would experience if they were planted outdoors. In the outdoors, seeds will go through a cold period before they will germinate.
Our video and blog post explains how to stratify seeds in detail.
Although not all seeds need stratification, milkweed, catnip, and lavender do.

Sow Seeds at the Proper Depth
When starting seeds indoors, sowing them at the proper depth is crucial for successful germination. While our seed packets provide instructions on how deep to plant individual varieties, there are general guidelines to follow.
The depth at which seeds should be sown is usually twice the diameter of the seed. This ensures that the seeds are not buried too deep, where they may struggle to push through the soil, or planted too shallow, where they may dry out quickly.
After sowing, lightly pack the soil around the seeds. This helps to ensure good soil-to-seed contact, which aids in moisture absorption and prevents the seeds from being exposed to excessive air or light.
Remember to follow the information provided on our seed packets, which is specific to each variety.
Determining the Number of Seeds to Plant
Ideally, every seed you plant will germinate and result in a healthy plant all the way through to harvest. But unfortunately, it doesn’t always work that way. When planting seeds, you will want to put 2 to 3 seeds in each cell or hole. You may also want to start more seedlings than you will eventually plant out. Just in case some don’t make it through the whole process. Be careful not to put too many seeds in each container, as they can quickly crowd each other out. This can be difficult with tiny seeds such as coleus and celery, so use a wet toothpick to sow them individually.
Seedling Care
Once your seeds have germinated and sprouted, it is crucial to provide proper care to ensure healthy seedlings. Here are some important aspects of seedling care:

1 - Provide Adequate Light
Seedlings need plenty of light to grow into strong and sturdy plants. If you don't have access to a sunny window, consider using fluorescent or LED grow lights. Position the lights about 2-4 inches above the seedlings and keep them on for about 12-16 hours a day. This will help promote strong and compact growth.
Leggy Seedlings
Leggy seedlings are seedlings that have elongated stems and weak growth. This is a common issue that occurs when seedlings don't receive enough light.
Seedlings stretch and grow taller to reach for the light source. Placing a light source close to your seedlings is essential to prevent legginess.
2 - Maintain Optimal Temperature
In general, seedlings prefer temperatures between 60-75°F (15-24°C). A consistent and warm environment will encourage proper growth. Avoid placing them in drafty areas, as extreme temperature fluctuations can stress the seedlings.
3 - Bottom Watering
To bottom water your seedlings, simply place the seed trays or containers in a shallow tray filled with water. The soil in the seed trays will absorb water from the bottom up, ensuring that the roots get the water they need while avoiding excessive moisture on the surface. This method helps prevent overwatering, which can lead to damping off and other problems.

4 - Thinning Seedlings
Thinning seedlings ensures that the remaining seedlings have enough space to grow and thrive. This process involves removing excess seedlings once the first true set of leaves emerge.
Thinning should be done when the seedlings are still relatively small, usually around 2-3 inches tall.
To thin the seedlings, gently grasp the excess sprouts and snip them off at the soil line using clean and sharp scissors or gardening shears. Snipping the seedlings rather than pulling them out prevents disturbing the roots of the remaining seedlings.
When thinning, keep the healthiest and strongest seedlings, spacing them out to allow for proper growth. Removing the weaker seedlings will prevent overcrowding and competition for light, water, and nutrients.
If you find yourself with small and tender seedlings that you have thinned out, consider using them as microgreens. These baby greens are packed with nutrients and can be used to add flavor and texture to salads, sandwiches, or other dishes.
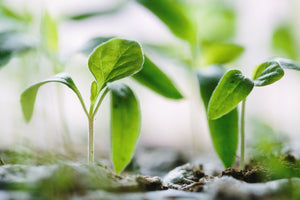
True Leaves
True leaves are a milestone in the growth of seedlings. The initial set of leaves are called cotyledons. True leaves are the second set of leaves that appear after germination. These leaves are usually larger and more defined, resembling the adult leaves of the plant.
True leaves play a crucial role in photosynthesis, where plants convert light energy into chemical energy to fuel their growth. Unlike cotyledons, true leaves have chlorophyll and are capable of capturing sunlight to produce food for the plant. True leaves also aid in the uptake and utilization of nutrients from the soil.

5 - Fertilizing
After your seedlings have grown their second set of true leaves, it's time to start thinking about fertilizing them. At this stage, the nutrients provided by the seed-starting mix may not be sufficient for their growth. Fertilizing your seedlings will ensure they have the necessary nutrients to develop into healthy and robust plants.
To fertilize your seedlings, you can use an organic, liquid or dry fertilizer. Mix the fertilizer at one-fourth of the recommended rate, as specified on the packaging. This will provide your seedlings with just enough essential nutrients without burning them.
There are alternative options you can consider for fertilizing your seedlings. Fish emulsion is a popular choice, as it is rich in nitrogen and other nutrients that promote healthy leaf and stem development. Another option is seaweed fertilizer, which is packed with micronutrients and beneficial plant hormones that stimulate growth and enhance overall plant health.
Remember to follow the instructions provided with the fertilizer to ensure you're applying it correctly and at the appropriate frequency. Over-fertilizing can harm your seedlings, so follow the recommended diluted dosage.

Transplanting Seedlings
Transplanting is one of our busiest gardening times. We look forward to this step and do everything we can to help our tender seedlings flourish outdoors.
Before we transplant, we make sure that it’s the right time. For plants that can’t tolerate frost, we make sure that we’re past the last frost date. We also take the time to harden off our seedlings.
When to Plant Your Seedlings Outside
Transplanting seedlings outside is a critical step in the seed-starting process, and it’s important to know when it’s the right time to do so.
The timing of transplanting depends on the specific recommendations provided on the seed packet and the last expected frost date in your region.
Different vegetables and flowers have different requirements when it comes to transplanting dates. Some hardy plants, such as broccoli and kale, can be planted outside a few weeks before the last expected frost date. On the other hand, tender plants like tomatoes and peppers should wait until after all danger of frost has passed.

Harden Off Your Seedlings
The process of "hardening off" involves gradually acclimating your indoor-grown seedlings to the elements they will face in the garden.
To begin the hardening-off process, choose a protected area outdoors, such as a porch or under a shade tree. Start by placing your seedlings outside in this area for just an hour or so, out of direct sunlight. This allows them to experience slightly cooler temperatures and gentle air circulation.
Over the next week, gradually increase the amount of time your seedlings spend outside. Each day, expose them to a bit more sunlight and a little longer outdoor time. This gradual exposure helps toughen them up and prevents shock.
During this acclimation period, be mindful of weather conditions. If it's too windy or too cold, bring your seedlings back indoors. Also, keep an eye out for pests and protect your seedlings accordingly.
Once your seedlings have had a week of gradual outdoor exposure, they should be ready to withstand garden conditions. Now you can confidently transplant them into their new permanent homes in the garden beds or containers.
To transplant your seedlings, gently remove them from their current containers, taking care not to damage their roots.
Dig a hole in the larger container or garden bed that is deep and wide enough to accommodate the roots of the seedlings.
Place each seedling in its designated hole and fill in with garden soil ensuring that the soil is firm around the base of the stem.
Water the transplanted seedlings thoroughly to help settle the soil around their roots.
After transplanting, continue providing the seedlings with appropriate care.
Protect them from harsh weather conditions, such as strong winds or extreme temperatures, by using protective covers or providing shade.
Regularly water the seedlings to keep the soil moist but not overly saturated.
When Direct Sowing Makes Sense
- When it comes to starting seeds, there are certain scenarios where direct sowing outdoors makes more sense than starting seeds indoors.
Direct sowing is recommended for plants with deep tap roots, such as carrots and radishes. These plants develop long, sturdy roots that reach deep into the soil, allowing them to access nutrients and moisture more efficiently. Starting them indoors and then transplanting them can disturb the delicate root system and hinder their growth. By directly sowing these seeds outdoors, you allow them to establish their roots in their final growing location from the beginning.
Some plants also grow faster and are better suited for direct sowing. Plants like zucchini, cucumber, and sunflowers have rapid growth rates and strong root systems. These plants usually grow fast enough for the outdoor growing season.
Additionally, direct sowing makes sense for plants that may not tolerate the process of transplanting well. Delicate flowers like poppies and wildflowers may have sensitive root systems and are better off being directly sown outdoors. This allows them to grow undisturbed and reduces the risk of damage to their delicate roots.
Starting your garden from seeds can be a truly rewarding experience for all gardeners. Not only does it allow you to have a wider selection of unique heirloom varieties, but it also allows you to witness the miracle of seeds transforming into thriving plants right before your eyes.
Growing from seed gives you the opportunity to explore a vast array of plant options that may not be available as transplants at your local garden centers. You can choose from a wide range of heirloom seeds, preserving traditional plant varieties that have been passed down through generations.

Watching tiny seeds sprout, grow leaves, and eventually produce beautiful flowers or delicious herbs and vegetables is truly a remarkable process. It provides a sense of accomplishment and connection to the natural world that can't be replicated by simply purchasing pre-grown plants.
As a beginner gardener, don't be afraid to make mistakes or encounter challenges along the way. Gardening is a continuous learning journey, and each season brings new opportunities to improve your skills and expand your knowledge.
So, embrace the wonder of seeds and enjoy the journey of growing from seed. With patience, care, and a little bit of trial and error, you'll soon be reaping the rewards of your own bountiful harvest.
And your gardening friends at Sow Right Seeds are here to help you along the way. You'll find specific growing tips in our Planter's Library. We're glad you're here!
If you found this information helpful, share it with your gardening friends.


Thank you for the information
I’m extremely happy to come across your site. So much great information which increases my confidence in seed starting. I’m on a mission to become more engaged with seeds this season. I love planting but have not done much from seeds. My indoor plants thrive & I’m excited for this next adventure! Thanks so much!
I’m a newbie Mine have been in the domes about a week. I used the peer grow and I actually have some good sprouts beating all ready I just got my grow light now. I’m addictive to watch them grow I’m in Georgia and this is my first time growing from seed wish me luck 😜
very helpful and informative information. I have grow lights on my seedlings and some seem “leggy” to me but they are only up about 3/4 inch after 5 days. on the other hand cucumbers seem very strong, thanks. A learning process for sure
Leave a comment